

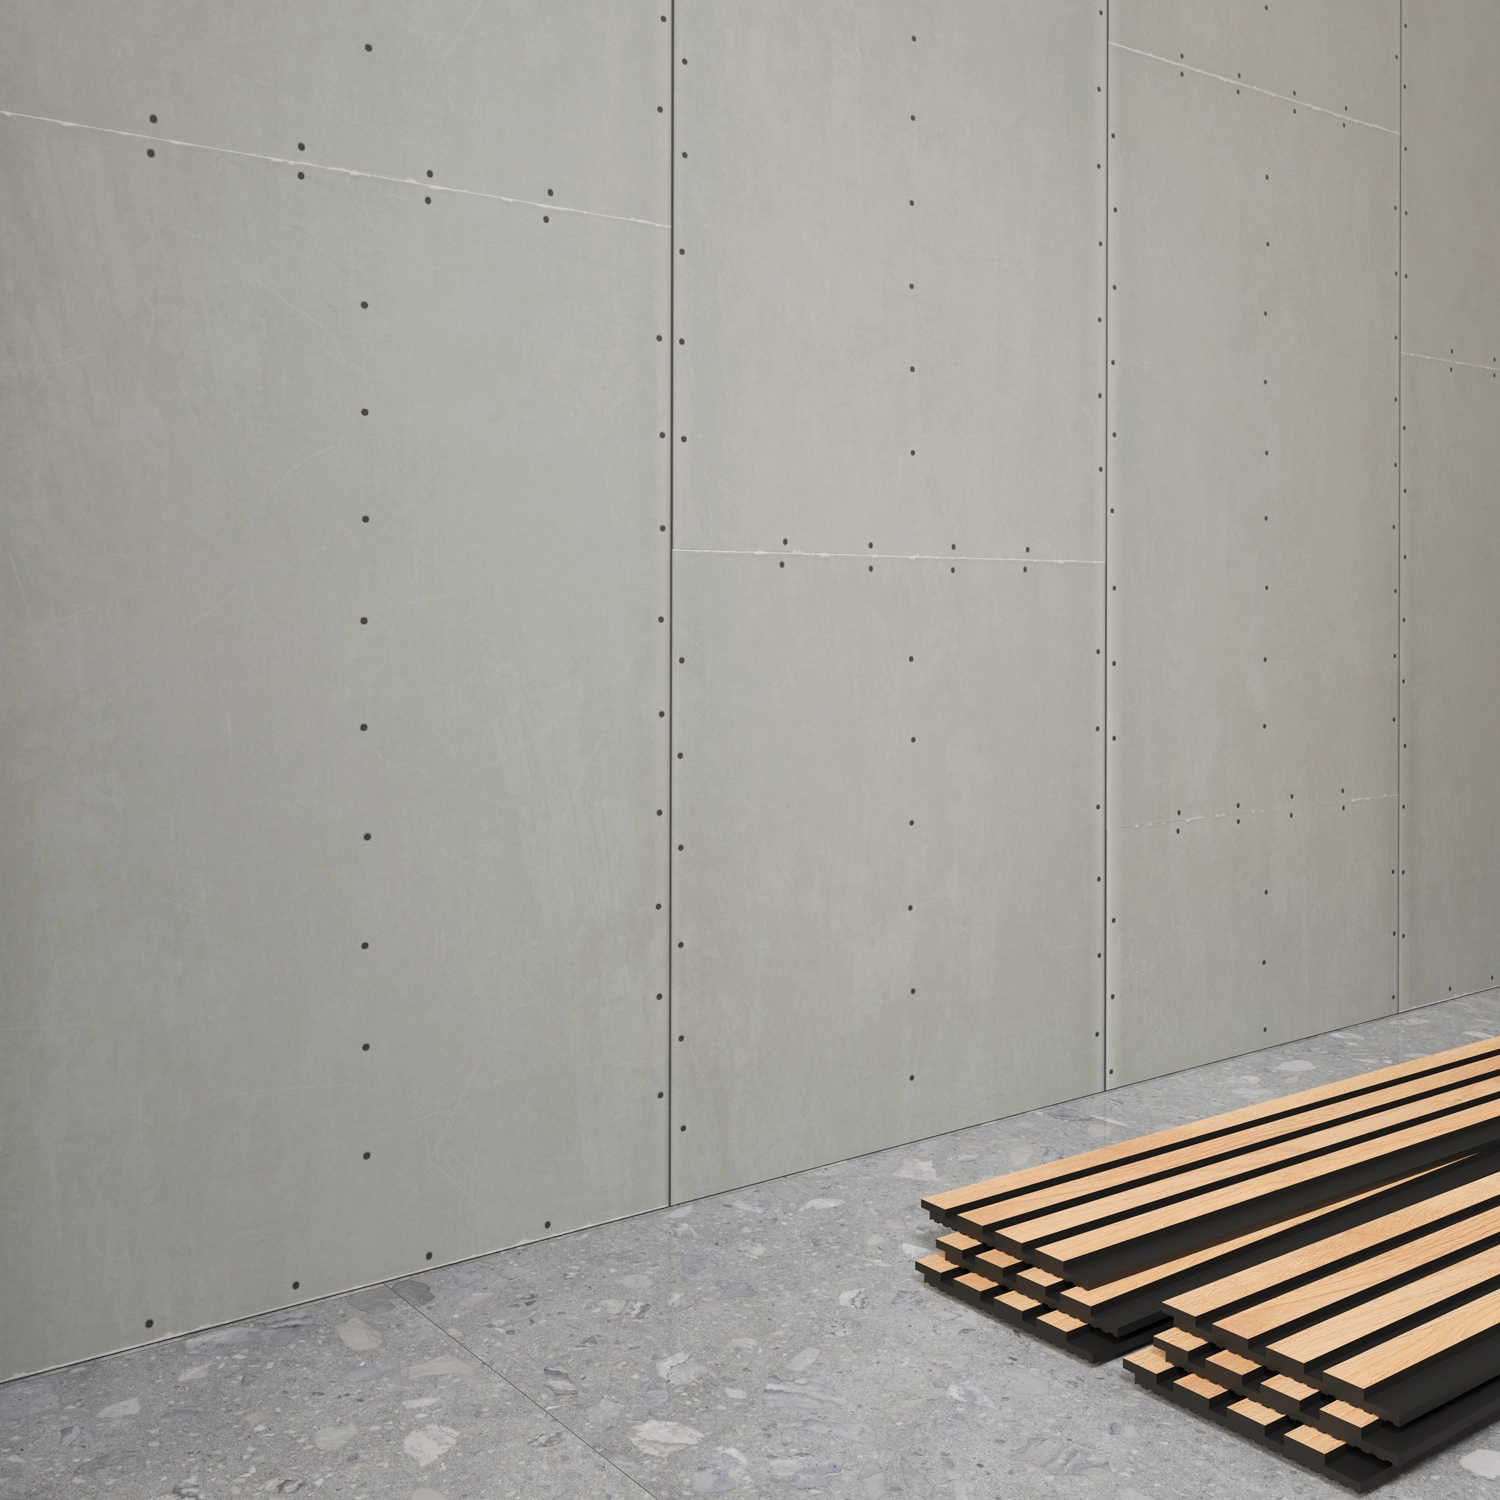
SURFACE PREPARATION
Before you begin, make sure the wall is in good condition. Repair any visible cracks or irregularities.
Wipe the wall with a damp cloth to remove dust and dirt, as these can affect the adhesion of the panel when applying the adhesive.
MEASUREMENT AND CUTTING
Measure the area where the panels will be installed and mark these dimensions on them.
Cut the PVC panels with a jigsaw or circular saw, adjusting them to the wall measurements to ensure a perfect fit.
APPLICATION OF FAST-ACTING MOUNTING ADHESIVE
Apply the fast-acting mounting adhesive to the back of the panel, distributing it in even lines for effective adhesion. It is recommended to use MS-Speedtack 3400 or a similar adhesive, as it dries in approximately 3 seconds, facilitating instant fixation.
Work with precision and speed, as the adhesive sets almost instantly. Follow the manufacturer's instructions to ensure correct application.

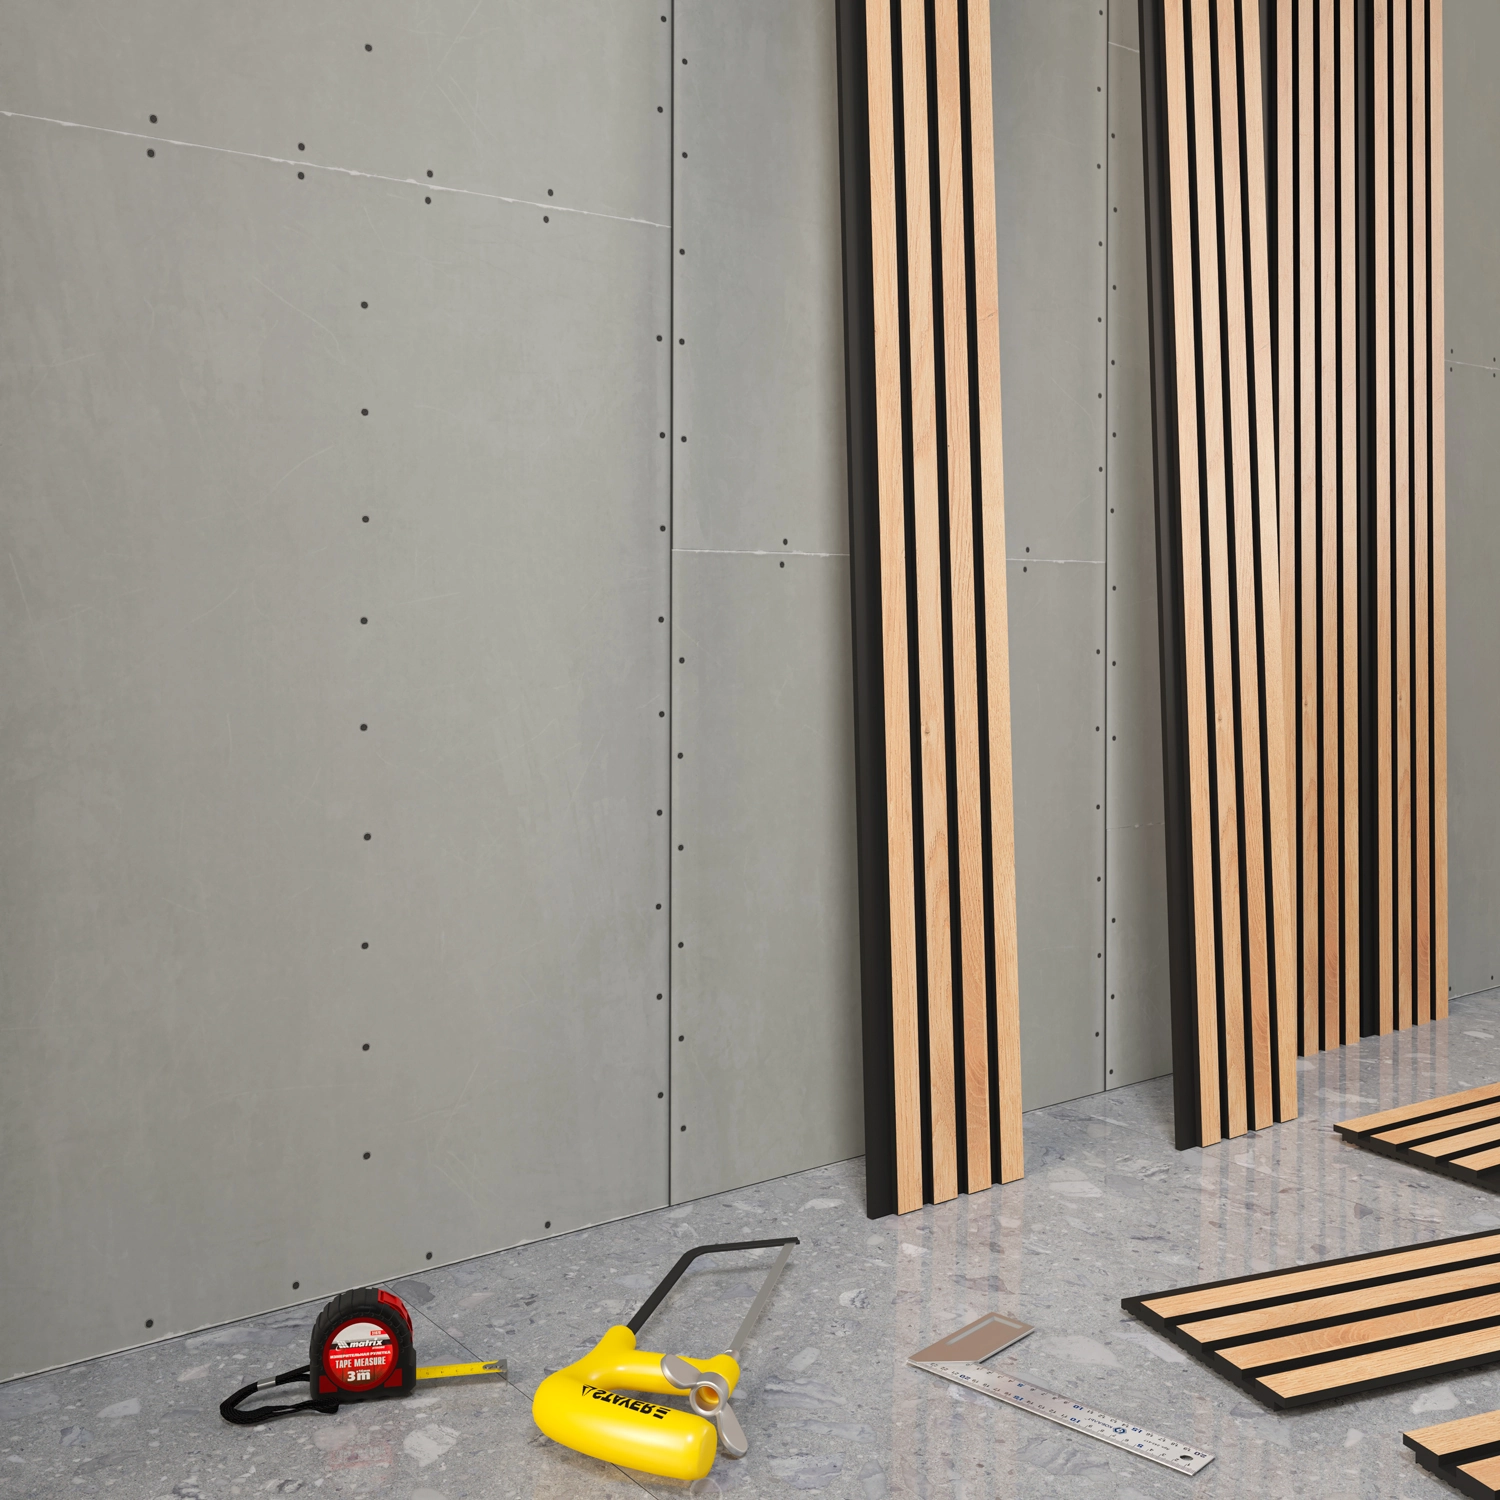
PLACEMENT OF PVC PANELS
Start from a corner or reference point, such as a door or window, to ensure uniform alignment.
Firmly press each panel against the wall in the desired position. Since the adhesive sets in 3 seconds, make sure each panel is perfectly aligned before applying as there will be no room for adjustments afterwards.
It continues with each panel, maintaining precise alignment and leveling, thus achieving a fast and firm installation.
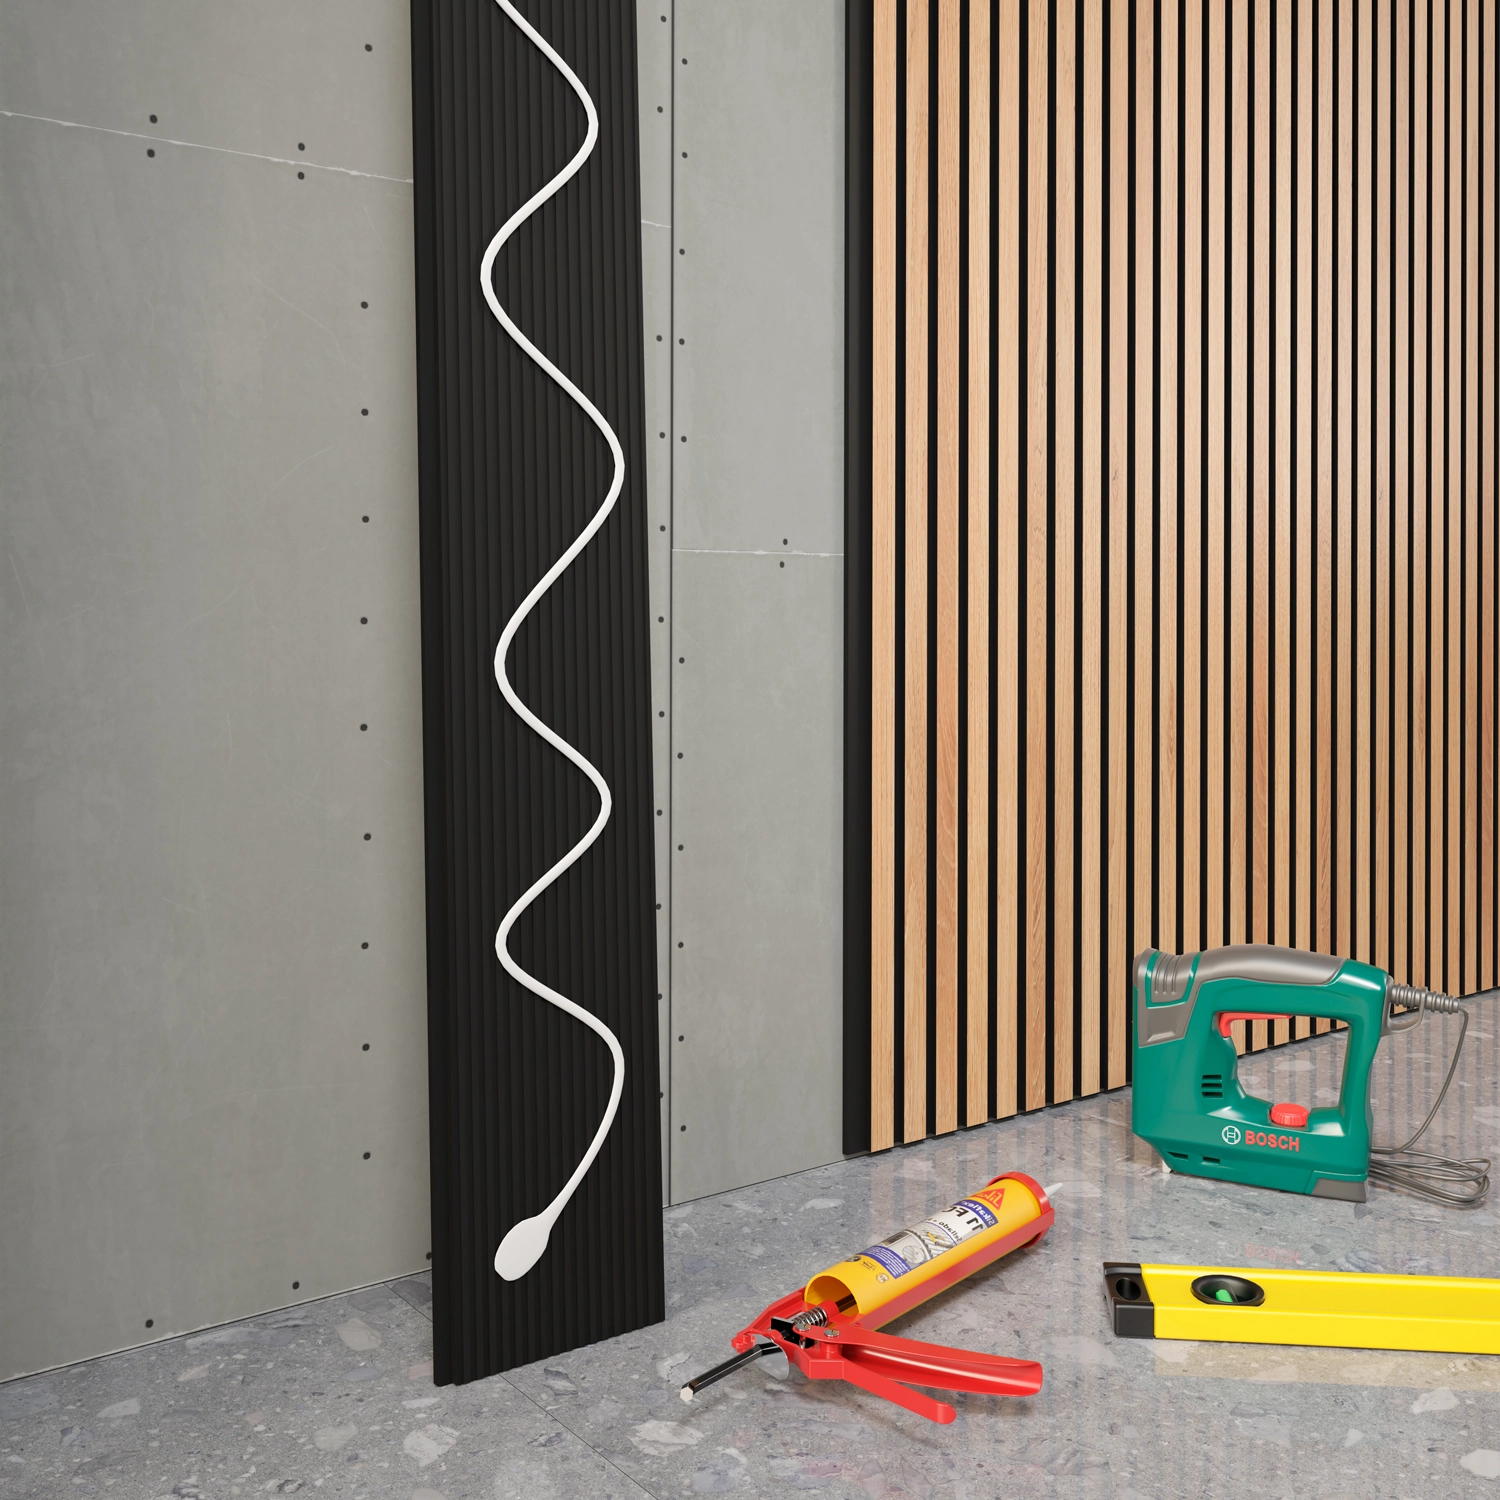
OPTIONAL INSTALLATION OF FINISHES
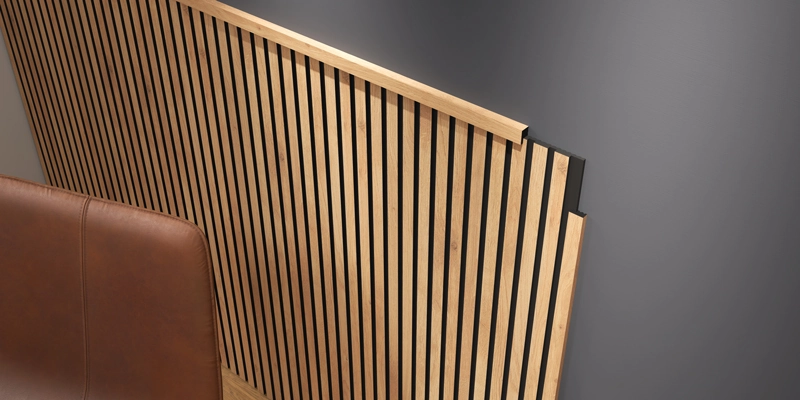
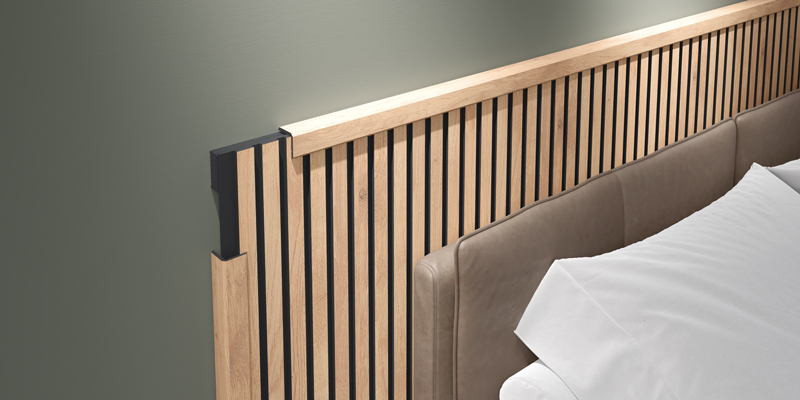
Top Trim (Horizontal): If you want to add an additional finish to the top, you can place a horizontal trim. Although it is not necessary in installations that cover the wall from floor to ceiling, adding it improves the look in decorative projects such as headboards, accent walls, sections of hallways or stairs, reception or lobby areas, TV or entertainment areas, and study or work spaces.
Side Finish (Vertical): You also have the option of placing vertical finishes on the side edges for a cleaner finish. This is optional as the panels can be finished bare, but if you want a more detailed look, finials offer a professional finish.

PREPARATION
Before you begin, make sure the wall is in good condition. Carefully inspect the surface for cracks or irregularities. Then, wipe the wall with a damp cloth to remove any dust or dirt that could affect the adhesion.

INSTALLATION OF PVC BATHS (100% RECYCLED)
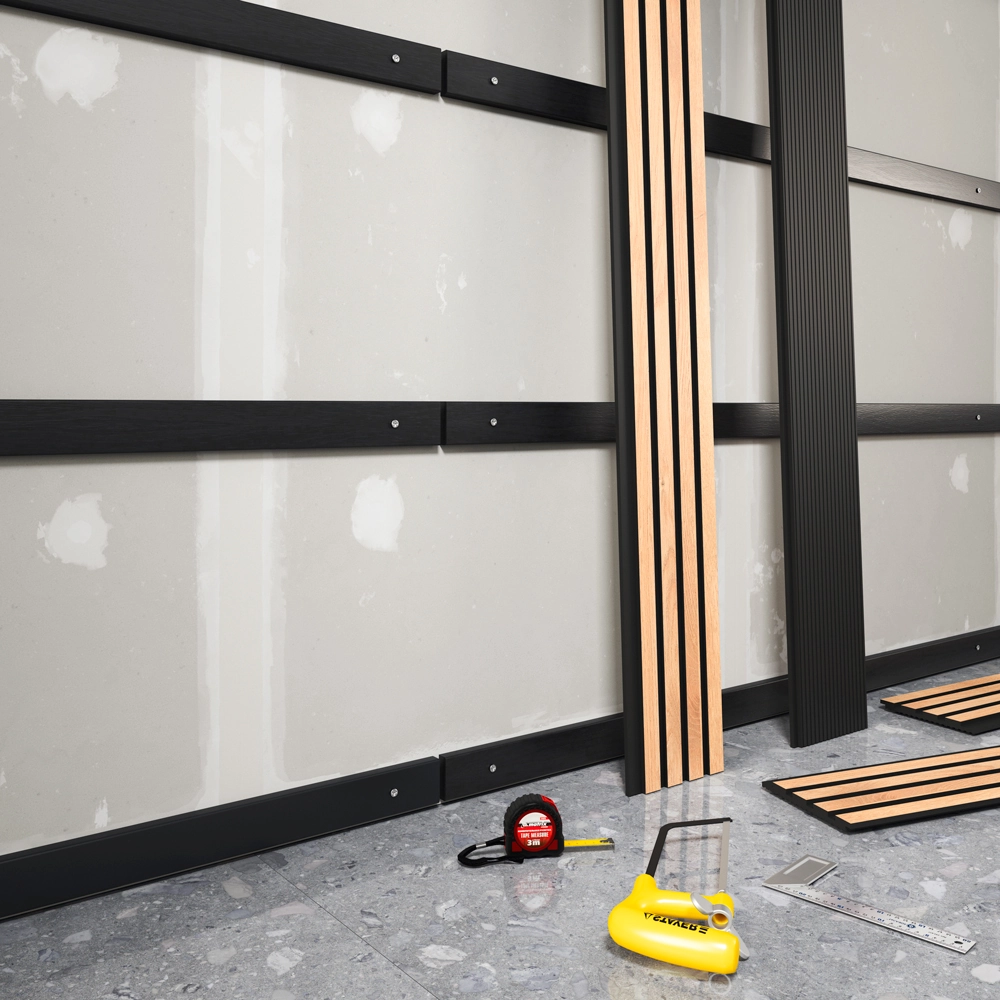
Fix the recycled PVC battens to the wall at regular intervals of 40 cm. Use a level to ensure that all battens are perfectly aligned and level, which is essential for the panels to be installed correctly. Make sure the battens are firmly anchored to the surface.
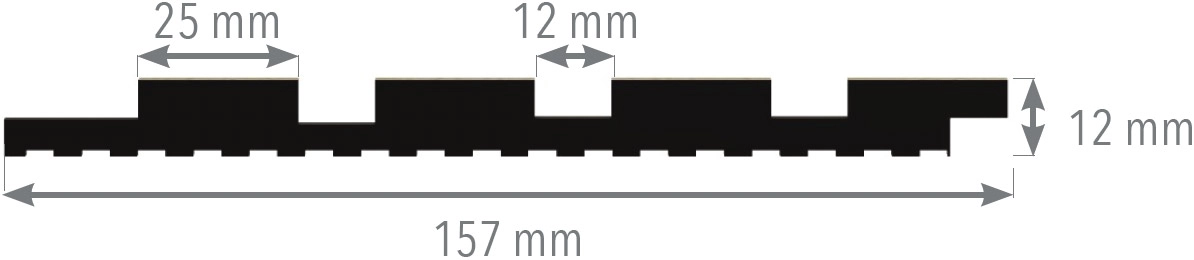
MEASUREMENT AND CUTTING
Accurately measure the area where you will install the panels. Mark these dimensions on the PVC panels and, using a suitable cutting tool (preferably a jigsaw or circular saw), cut the pieces to the necessary measurements to fit the wall.
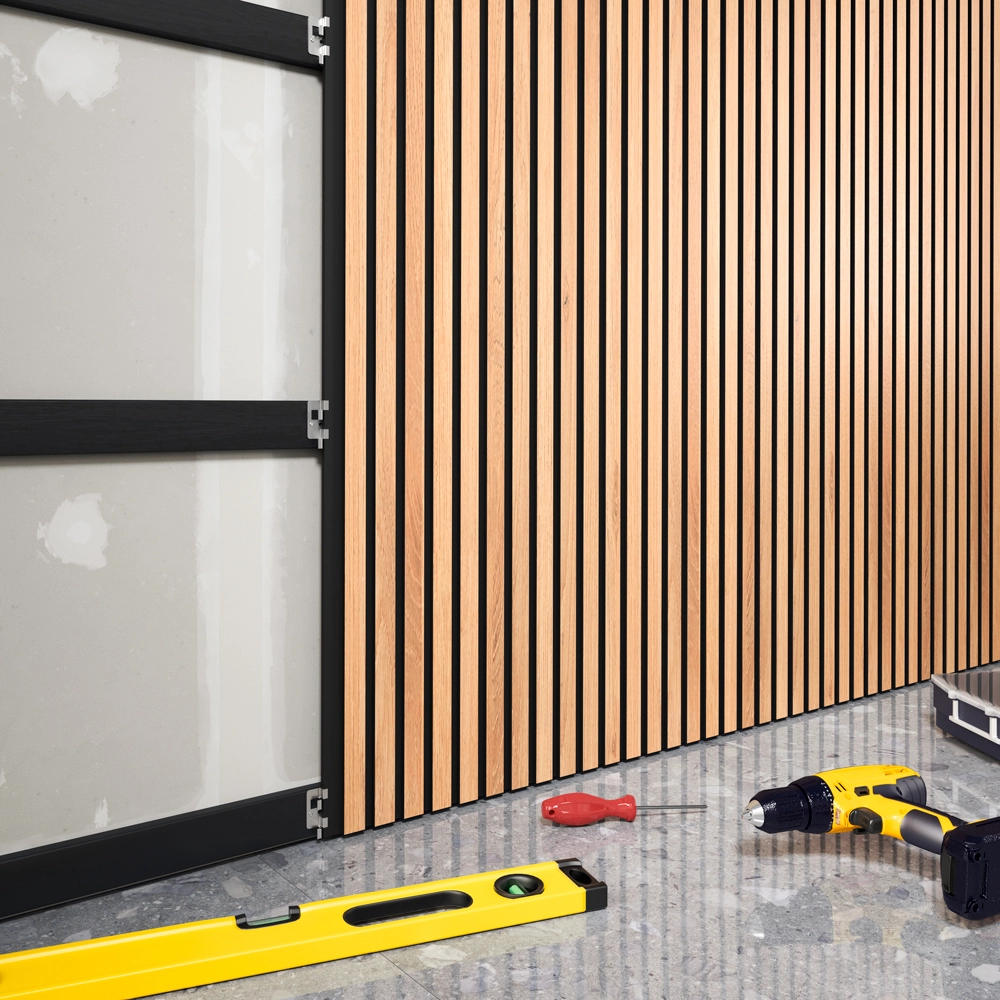
PLACING PVC PANELS WITH METAL STAPLES
Begin installation from a corner or reference point, such as a door or window, to ensure uniform alignment. Place the panel pieces, fixing them to the battens with metal staples. Insert a staple between each panel piece and, making sure it is positioned correctly, screw it directly to the PVC batten. Check that each piece is securely fastened and aligned with the others.
OPTIONAL INSTALLATION OF FINISHES (OPTIONAL ACCORDING TO SURFACE COVERAGE)
Floor-to-ceiling or wall-to-wall installations: If the installation covers the entire floor-to-ceiling or wall-to-wall surface, trim is not necessary and can be omitted.
Partial installations: When the installation does not cover the entire surface, it is recommended to use a single type of finish for both the top and side edges, providing an aesthetic and functional closure that covers the air chamber and improves the finish.
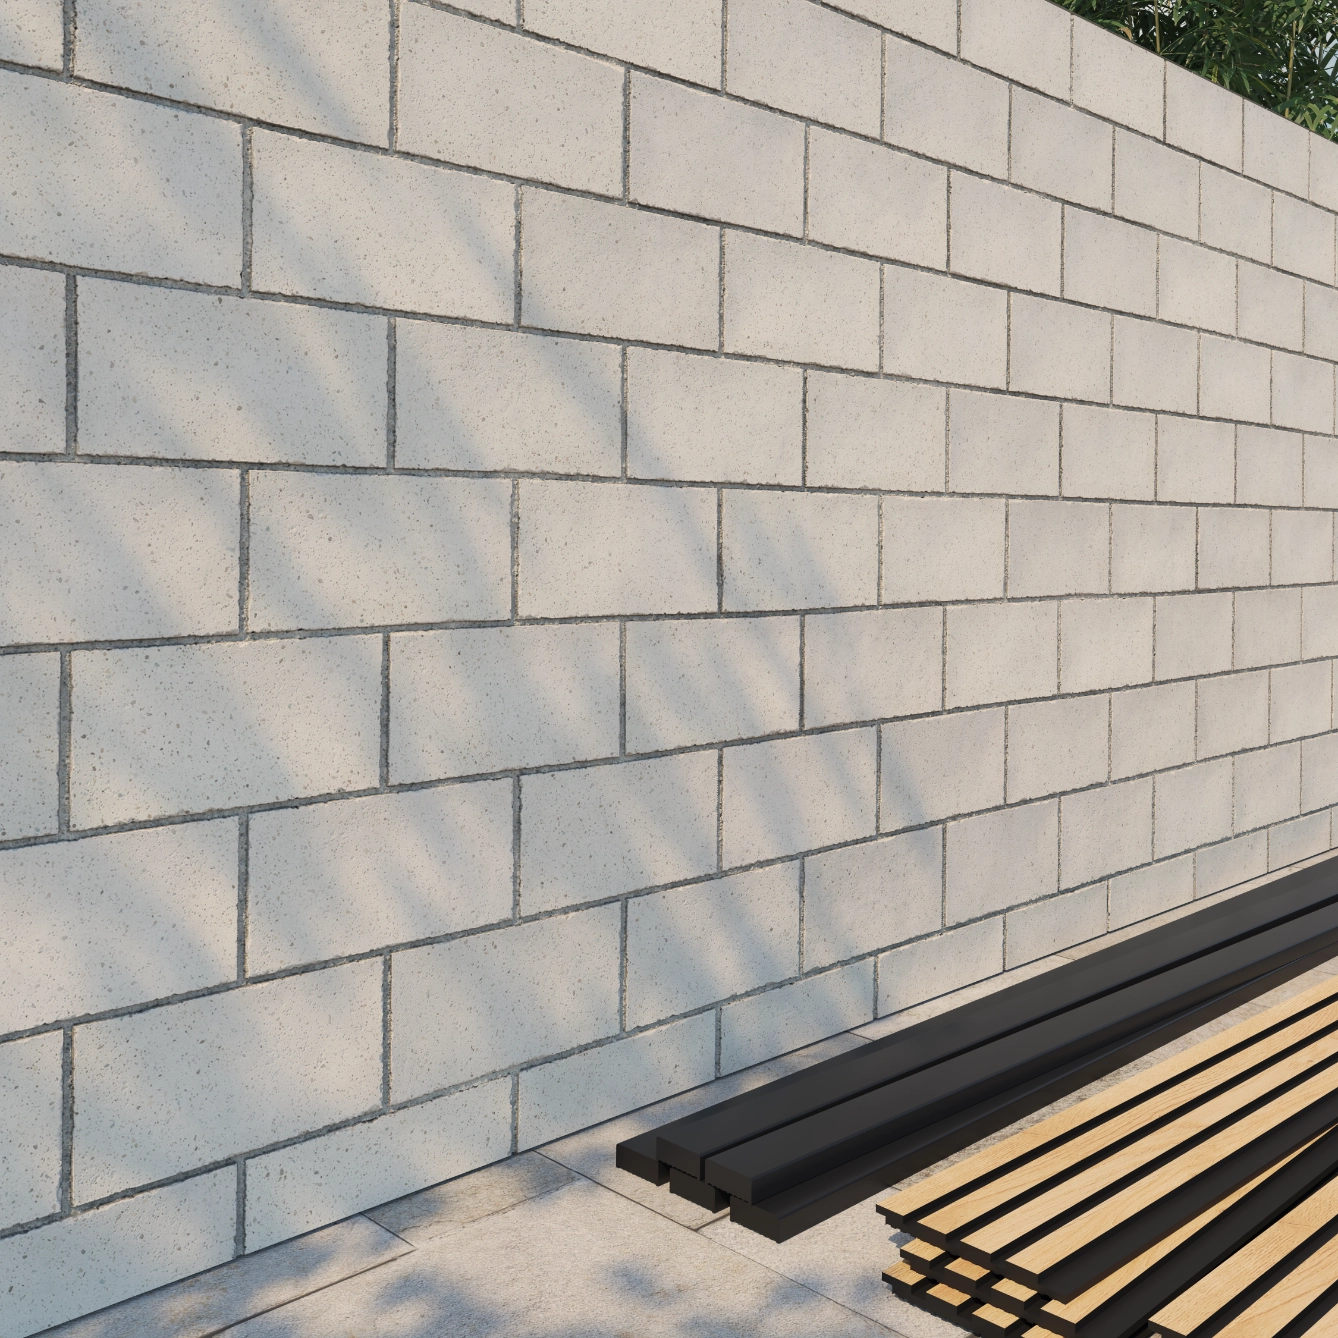
PREPARATION
Before you begin, make sure the wall is in good condition. Carefully inspect the surface for cracks or irregularities. Then, wipe the wall with a damp cloth to remove any dust or dirt that could affect the adhesion.

INSTALLATION OF PVC BATHS (100% RECYCLED)
Fix the recycled PVC battens to the wall at regular intervals of 40 cm. Use a level to ensure that all battens are perfectly aligned and level, which is essential for the panels to be installed correctly. Make sure the battens are firmly anchored to the surface.
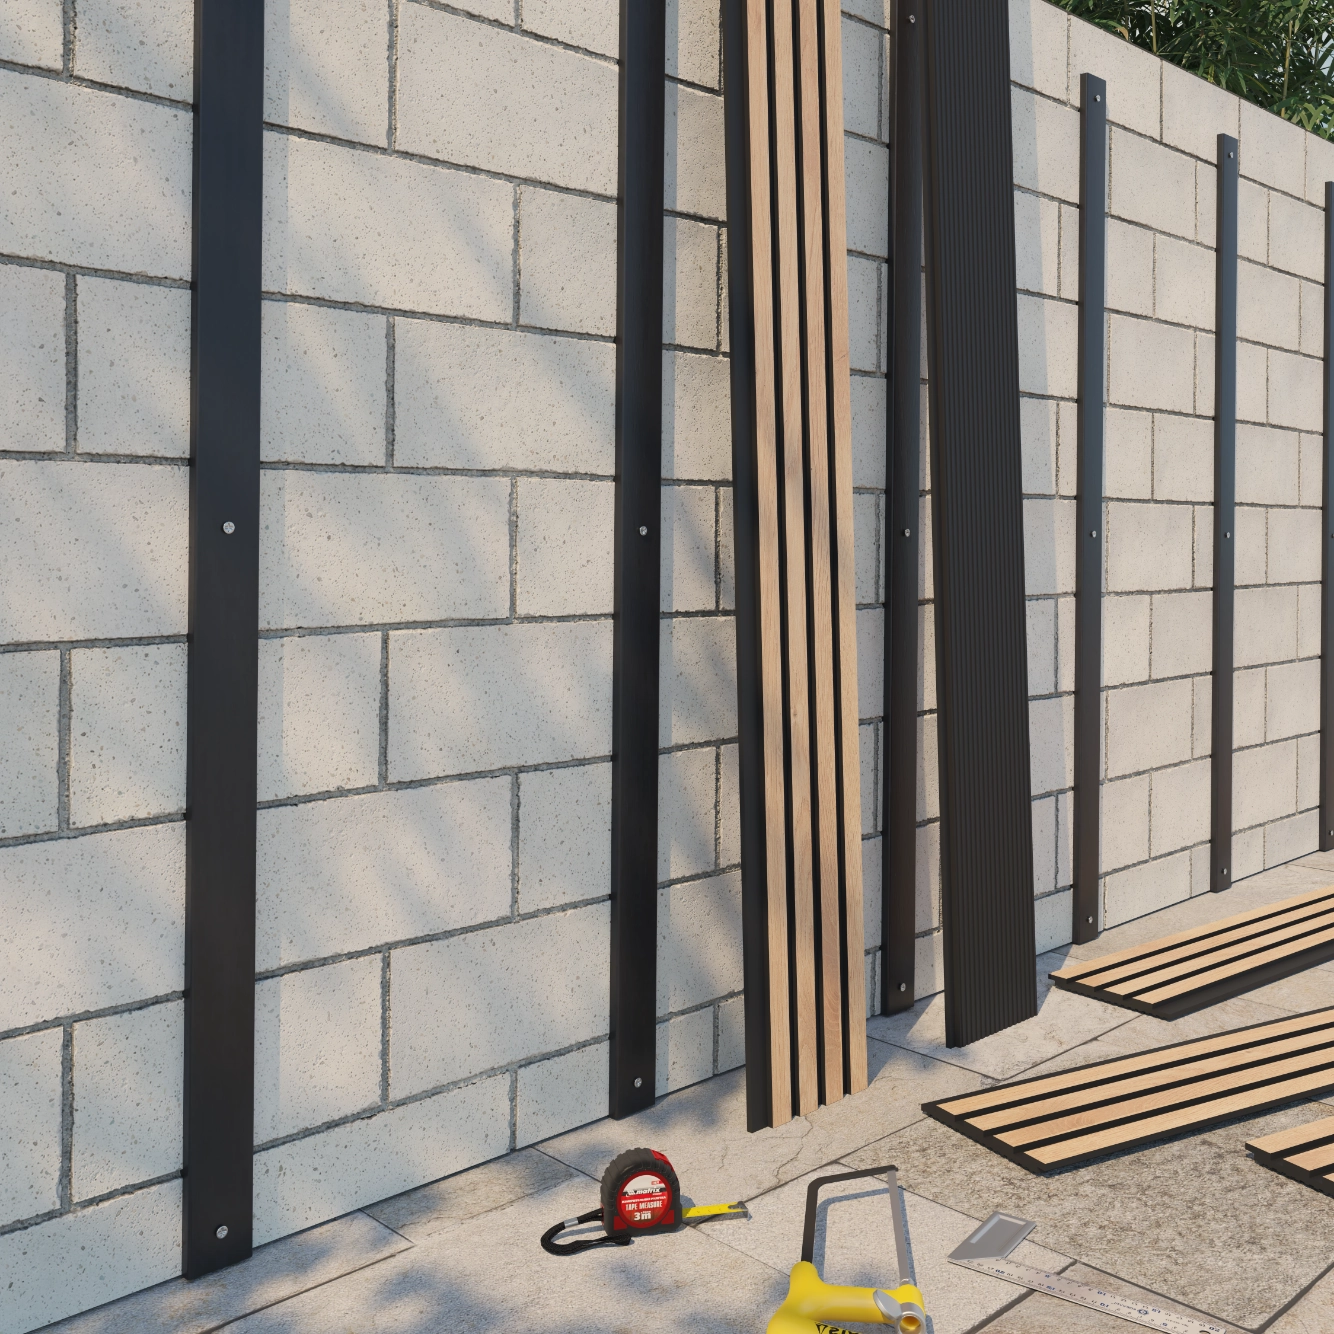
MEASUREMENT AND CUTTING
Accurately measure the area where you will install the panels. Mark these dimensions on the PVC panels and, using a suitable cutting tool (preferably a jigsaw or circular saw), cut the pieces to the necessary measurements to fit the wall.
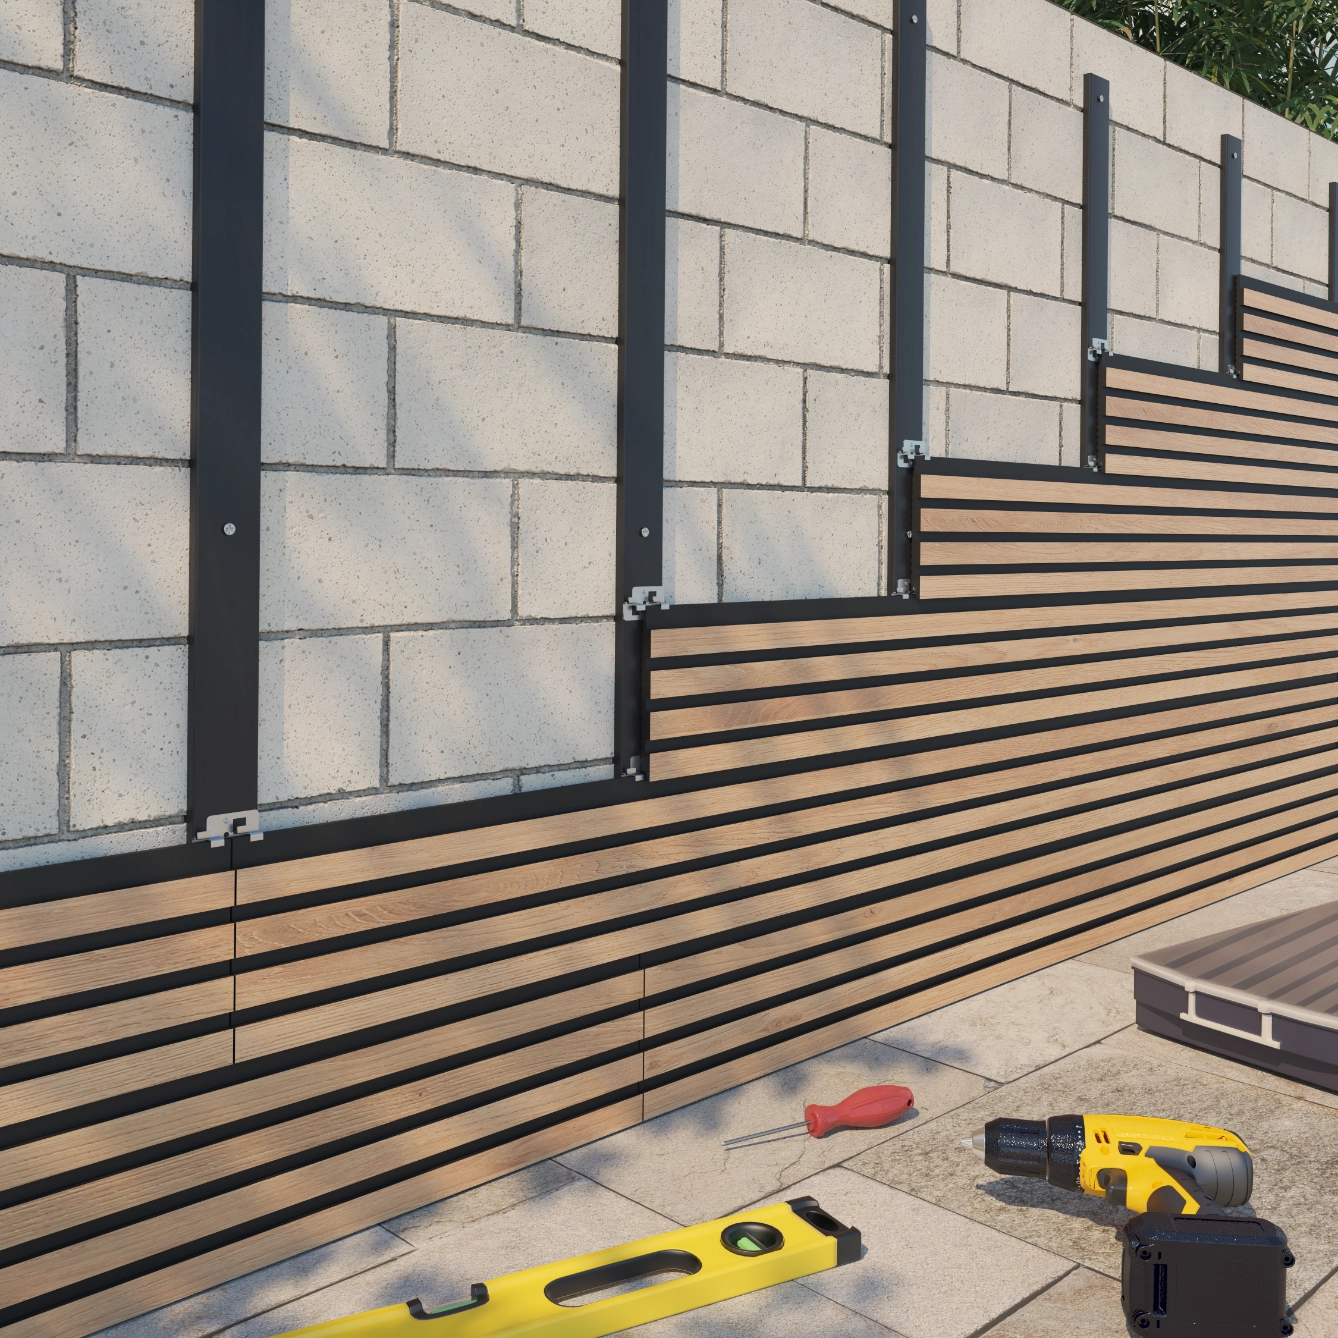
PLACING PVC PANELS WITH METAL STAPLES
Begin installation from a corner or reference point, such as a door or window, to ensure uniform alignment. Place the panel pieces, fixing them to the battens with metal staples. Insert a staple between each panel piece and, making sure it is positioned correctly, screw it directly to the PVC batten. Check that each piece is securely fastened and aligned with the others.

INSTALLATION OF OUTDOOR FINISHES (REQUIRED)
In exterior installations, it is always recommended to use finials to achieve an aesthetic and functional finish, especially in structures that do not have an end stop, such as fences or exposed elements without a roof or wall.
The finial will provide adequate closure, protecting the edges and ensuring that the coating maintains its integrity and appearance against external conditions.